Research
Channel Branding
Branding is essentially the backbone of this project so my first part of research was to look at how other TV channels brand themselves not only on TV but also with their youtube channel art.
As a refresher Idents are a form of branding and identy for channels on television. Idents are constantly being changed and remade for channels so there are a wide range of idents to chose from and review.
I've reviewed some idents before on my website and those can be seen here
I first looked at the big recognisable channels' idents and graphics. These being the BBC, ITV and Channel 4
BBC
The first ever ident for the BBC was "the bat's wings" the ident was made by Abram Grames in 1958. The designs Abram came up with in sketches were all circular. Abram explained his design - "Television was a world medium, and the central sphere "he drew" might be thought of as the world, with light and television signals radiating outward from it." This circular design has stuck throughout many designs for BBC one even till this day


"Full Circle" 2010-2017
"Lense" 2022-Present
ITV
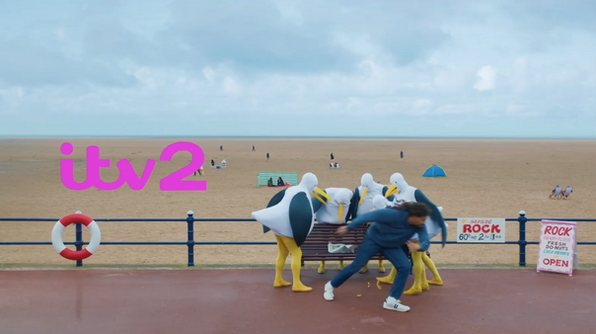
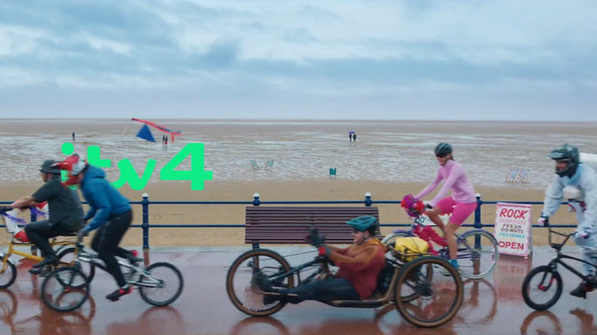
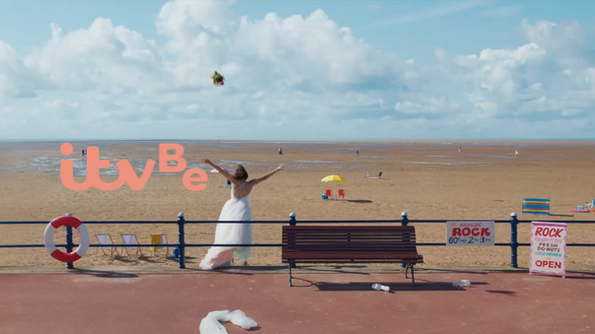
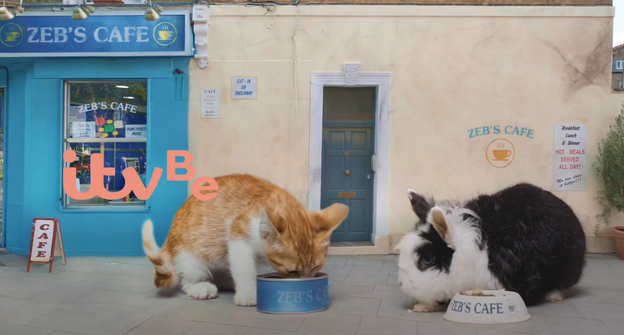
Unlike the BBC ITV hasn't kept too consistant with its idents, this isn't helped by the fact that there where different channels representing "ITV" across the country, All with different names. ITV has a mix of purely graphic idents and filmed idents that they use. One of these are the "location" idents. These idents are all shot a certain part of the country and showcase a small situation that links towards the vibe of the channel. Click on the gallery below to see a short analysis of the styles.


"ITV1 Stinger" 2022-Present
"ITV Creates" 2020-2022
Channel 4
Channel 4's modern ident is easily my favorite. The ident features the 4 logo at the centre of the screen as the camera wraps to it's side and zooms inside. Inside of each 4 is a different story, a different part of the country, a different set of people living different lives. Some of them are overly dramatic situations, others are basic human interaction. The different scenes show so many different parts of life and uk culture. They show so many different styles of art too. From stylistic animation to basic camera movement.
It shows how different we are as a country and as people so well through this constant change of environment, artstyle and tone. It also perfectly shows the amazing creativity not only on channel 4, but in the country. The completely different environments reflect England with how diverse it's landscapes and cities are, which is why it's so good for film and art. Each scene had a different director working on them which makes it feel like each scene is taken from a movie and is telling a different persons story. They don't stop for any of these stories. They keep going through to the next story, to the next people. All of this is happening at the same time. All of these moments happy or sad, impactful or mundane are happening to everyone all across the country. The only thing conecting these stories is the 4. The Ident doesn't end. it's a perfect loop. Further pushing this element of it happening all at once.
This Ident is the perfect representation for channel 4 right down to it's core values of inclusivity. It not only shows the incredibly vast variety of content on channel 4 but the variety in our comunity and lives. Whilst it may just be an Ident I think that channel 4 have made a beautiful work of art here, something that represents everyone, tells everyone's stories, shows everyone's art and it's all linked together by the 4 logo.
I highly suggest you watch the Ident full film. it shows all of the idents intertwined with one another with a powerful poetry reading over the top. I would also watch the behind the scenes video as it goes into depth about the thought process behind it's creation. Both can be seen linked below
I also looked at some of the youtube branding for these channels
Making the Youtube branding is just as important as the actual animated graphics seeing as this is where all of the work will be on

For many of the channels banners they're mainly promoting something on the channel


For many of the channels banners they're mainly promoting something on the channel
I'd like to make something slightly more creative for the college channel
Looking at these idents gave me a much bigger respect for how much an ident can represent a brand and how much thought goes into them. Whilst limited with how many idents I can make (due to running all of the streaming off of OBS.) I do think it would be fun to look at creating idents on a much larger scale. Ones that are able to be artforms of their own just like the channel 4 ones
Automation In OBS
As a part of my lesser objective to do the scheduling and playlist of the channel I looked for way to make OBS pick a random video from a playlist and switch scenes on the hour.
Irrelevant of the project this will help me a lot for when I stream and use OBS in the future, so this was an incredibly useful thing to learn.
My first point of research was to look at how infinity streams are done on twitch.
On the right you can see two examples of infinity streams on twitch. These streams will endlessly go through a collection of these creators old videos and replay them an loop.


I spoke with my client about what he actually needs for the automation and he explained that he wanted every hour a different genre of work to play. For example at 9 - music videos, at 10 - documentaries.
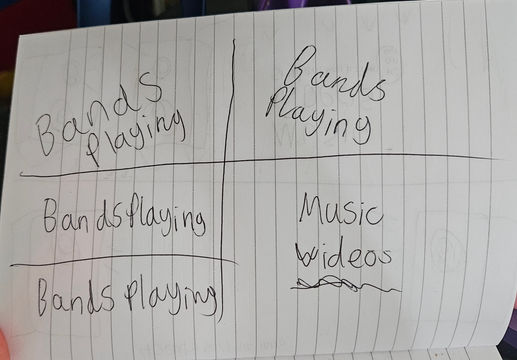
Immediately I started to flowchart out how to do this in my head.
At 9 the scene of Music Videos will play with a randomised folder inside of it. At ten OBS will need to switch scene over to the documentaries
There are two different things I'll need to figure out in order to pull this off. I'll need to find a way to randomise folders in OBS and A way to switch obs scenes on a timer
I searched on google for a way to solve both of these and to my suprise found a solution almost immediately.
The first video I found was an application that completely randomised a folder and puts it into a browser link to use in OBS. The second was a script for OBS that allowed me to create a timer that would swap scenes when finished both can be seen linked below
On the right you can see the application that randomises the playlists. By putting this app in a folder with other videos then opening this it will create a browser link of all the randomising videos. When opening the app the command prompt will open and give us some options.

For the college channel we'd need to say no to the first 2 qustions and yes to the last one. When saying yes to the last question is it will come up with all the videos in the playlist for us to select from.


Above you can see a sped up version of the randomiser working with footage found on my computer as an example

The video on the right was for a script that can be used in OBS to create a timer. At the end of the timer you can either chose to display text or skip to the next scene. By setting this timer to an hour on the college OBS It would be able to change the genre of content on the hour as it was following a scheduling
This was my first time using scripts in OBS, in fact before this I didn't even know that you could add scripts to OBS. In the tools drop bar you can find the scripts tab. Pressing this will open the pop-up seen on the left.
The video gave simple instructions on how to apply the script which where easy enought to follow, however it only explained setting up one timer on one scene. In order to create a perfect loop on the college OBS I would need a lot more timers.
I tried importing the script twice however it didn't count as a second script and would allow me to add 2. I left a comment on the video to see if anybody had any solution, however despite getting no replies, I was able to come up with a solution on my own.
By duplicating the file before putting it in OBS' script folder, If it's named something else it's recognised as a seperate script. I set the timer source to a different text box on a different scene and was able to create a perfect loop with my two scenes.

I feel it's important to list some specifics about the process that are mistakes I initially made.
• When linking the timer source I initially duplicated the text layer from scene one to scene two. The countdown timer reads these text boxes as the same source and the names can't be individually changed if they're duplicates. This means that you have to create a brand new text box in each scene.
• When I was duplicating the scripts and renaming them, I initially did this inside of the OBS script folder. This didn't seem to work when I tried it so to save time I'd duplicate the scripts before sending them to the script folder.
• It's also useful to know that the timer doesn't have to be on screen the whole time and can be hidden by either putting it a layer behind or just simply making it invisible. The timer effect will still work even if it's invisible.
Below you can see two scenes looping between one another

All of the techniques will help out with the college TV channel but they'll also help me out a lot in my own hobbies with streaming. I'm excited to see if there are any other scripts and applications to boost my ability in OBS and take my streaming to the next level.
File Adaption
In order for the randomiser application seen above to work all of the video files in the folder need to be either a mp4 or a mov. Luckily this is the standard for most footage nowadays. However as a part of the "From the Vault" we'll be playing old footage from the college's history. These files aren't mp4s or movs so they need to be adapted.

Usually when adapting footage I usually put the footage into premier and export it as and mp4. Sadly I'm all of the footage was on a computer that couldn't download premier and to go back and forth from computer to computer sending footage forward and back would take too long.
Luckily, I found an application that was far quicker than re-exporting the video in premier. I was able to download application onto a USB and install it onto the computer with all of the footage.

Using handbrake is incredibly simple. All you have to do is drag and drop in your footage and it will show up with options with the first one of these being the format that we want to convert into. Simply by selecting what we want then pressing encode we're able to format all of our old videos into a new format. There are also some other options we have. Like for example we can close caption add subtitles which can be incredibly useful. We can also split the video into chapters. None of these are something i'd like to use for this project, but i'm sure they'll come in handy when editing my personal videos. Especially the subtitles feature.
Problems With The Streaming PC
As mentioned before there where problems with the streaming PC in terms of importing footage. This PC was incapable of downloading anything. This made my job a lot harder. What also didn't help was that it was unable to connect to onedrive. This meant that any files I had on my one drive couldn't be directly downloaded to the pc. The workaround to this was to download what I needed onto a USB stick and bring it to the pc. This was how I got the obs randomiser and scripts alongside the aforementioned handbreak
Production
Logo Adaptation
As a part of the branding I wanted to make my own adaptation of the HC TV logo that could be used for the youtube channel and on the live streams
Below you can see a rendition of the original logo. I quite like how the tv has unfinished lines similar to the circle on the radio logo


Other than that I do feel like the the tv logo is slightly outdated and needed a new version. I emailed my client about the design for the logo to see if there where any specifications about the design.


Once getting this information I jumped into Illustrator to create a sleeker version on the old TV. I decided to make it more rounded and simple. Although the specification asked for Red, Green and Blue spots (symbolising buttons) I wasn't a very big fan of how the buttons looked. Because of this I removed the space for the buttons and decided to use the colours elsewhere.
I think these TV looked a little bit cleaner than the one currently used.
From here using the same font as last time (Arial Black)
The letters where originally spaced further apart however after talking to my client I made them much closer together.
When it came to adding the colours I decided I wanted to add them between the antennas as if little radio waves. I made these by making a straight line and applying the stroke effect "scribble" on the right you can see a rough recreation.
With these I felt the middle tv was barron inside so i decided to create a grid that went inside it.


Client Feedback
As mentioned before my client asked for the text to be closer together. After showing him my full edit with the radiowaves and the grid, he suggested some changes. Instead of the grid the radio waves should be in the main so as to look live tv static. This fixed the problem of the barron screen and also made the whole thing more self contained. My client also asked for the order of the colours to be, red, green, blue as to link with RGB which made total sense.
I liked how these looked a lot. In order to fill the top and bottom of the screen I created two more of these and made them both grey. I think the two grey waves tied it all together


Final Outcome
I'm incredibly thankful for my clients suggestions beause they made the whole logo look so much better
Original design

Final design

I'm actually quite happy with how the logo looks.
I wans't sure if the rounded look was the way to go once I had made it, but i'm glad I stuck with it because I think it looks quite nice. It's certainly simpler which seems to be the way most company logos are going in the modern era

Ident Animation
My initial plan was to make an ident and a stinger. The ident would play at the beginning of the hour and the stinger would be much shorter and play in-between each video
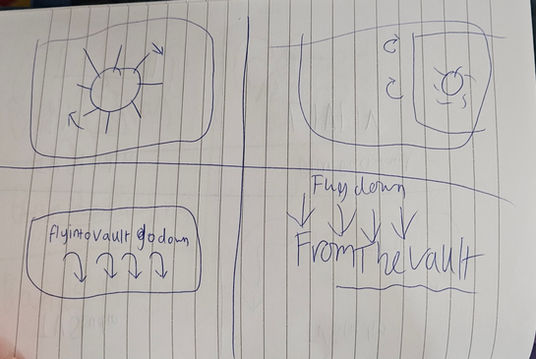
I made very rough story boards just to get a brief idea of what i'm making. I can't draw so they may not make sense to anyone but myself however they can be found in the gallery below
When sorting out the randomiser I realised there wasn't an option to set a video to play first every time this mean that I would need to create another scene for each individual ident I wanted to use.
I was prepared to do this and spoke to my client about it and he explained that I didn't have to make idents like that which made my life a lot easier.
My original idea for the stingers was to have a different graphic that represented the genre, I decided to change this after talking to my client about the branding and constancy of the channel.
On after effects I created a very short stinger for music videos just to test and show my client my work
I made a simple drum beat on soundtrap.com , the same way I did for the radio drama project.
I used some bright colours, sharp angles, quick transitions and an echo effect to try and give a sort of retro feeling to the graphics whilst still being sleek and modern. I made this very quickly and had a lot more that I wanted to add in my final version. For example, I wanted to add some more graphics that represent the genre more, (for example music videos would have feint sound levels, documentaries could have a magnifying glass) I also thought that the font could be changed. However when I showed this to my client they where quite happy with it. The only suggestion being to replace the "HCTV Student work" with the new logo.

I tried adding the logo below the title and it looked slightly weird so I decided to make a third screen exclusively for the logo so it could take up the whole screen
I wanted to make to more graphics for two different occasions on the channel. I wanted to make a graphic that shows the schedule for the channel alongside this I wanted to make a graphic for when special events happen. These being live tv shows that the years 2 do as both a part of the course and enrichment.
Because these would last longer and be used on rarer occasions I wanted to make a longer song for it. I still wanted to keep the drum beat however I really don't know much about music. Luckily I have a connection with someone that is on a music course that I've worked with before. I asked them if they could help me make a variation of my original drum beat that we could use for the graphic.
I wanted the graphic to be flashy and obviously feel like something you don't see on the channel usually. I still wanted it to be consistent with the other graphics so I used very similar effects with thick lines, echos, trim paths.
I tried multiple different intros for the animation A lot of these involving a spiral with trim paths. My original plan was to have the spiral fly into the middle of the screen then pop out with action lines as it disappears. I made multiple versions of the spiral that didn't look too good so I decided to change this. I also was struggling with how to actually use that as a transition to text.
I then remembered that when making graphics for a friend I made text glitch onto the screen when it appeared. This was an easy way to make text appear which I decided to use for this special event graphic.

Alongside this I also made a small lower third to be used when preparing for the show

Learning Blender
As a part of some of my graphics I was tasked to make a small opening animation for the "into the vault" category of videos. These being old footage from the college.
From the outset I knew that I wanted this to be a 3D animated vault door opening. This was further pushed by my client sending me a greenscreen video of a vault door opening as reference.
The problem with this is that I've never animated in 3d before and the thought of trying blender for the first time terrified me.
I downloaded Blender. and immediately tried to get my barings in the software. I recorded some of my first experience so I can show some of this below
I didn't want to start by doing a tutorial immediately which may have been a silly thing to do with blender being as big as it is. I found a royalty free vault on sketch fab that looked simple enough to animate so I dragged it into Blender and started to get my bearings. I was having a lot of problems with the key frames at first. They work slightly different in this software in terms of actually placing them In after effects you can place keyframes and then adjust the values after the fact. This isn't possible in blender which confused me a lot. The keyframes just didn't seem to be sticking. After a while realised that the order in which they're place matters. The value needs to be changed first then the keyframes can be made. Another problem I had was animating the door and the lock separately. It seemed like such a simple task but for some reason I was making it a lot harder.
Joining Animation
When animating the lock I had to join the handles to the actual lock itself which was simple after that it was simple rotation keyframes. After this I wanted the door to open, obviously with the lock connected to it. I was trying to figure out how connect the two without having the door spin when the lock spins. For some reason this wasn't happening. My initial attempt was to duplicate the lock and have one spin, disappear, then have the second lock open with the door. I wasn't sure how to delete create a lock at the beginning of the composition though so after 1 night of problems I decided to scrap the 2 lock idea. I also really wanted to try and parent the lock to the door like you can in after effects however this is another feature that isn't in blender. Eventually I joined the already spinning lock and the stationary door and it worked. Like I said somehow I made this a lot harder than it should have been.
Learning Important Bits
As I was working on this I had to look up a few things. The first thing I looked up was how to move the anchor point so I could rotate the door from is actual hinge. There are multiple ways to do this but the one I need is to set the point of origin to the 3d cursor. The 3d cursor is the second tool on the tool bar, the circle with red an white lines. Eventually I caved and looked up a guide to teach me the basics of blender. This tutorial was a part of the most iconic tutorial in blender "The donut tutorial" even though i was looking at the first part of this I still wanted to try do the vault first, out of my own stubbornness. This tutorial taught me more about the basic workings of the software, hotkeys and more.
I was making slow and steady progress with the vault. I had finished animating the door and the camera and was busy making the vault itself. I made a big cube and cut a hole into it with the boolean modifier and a cylinder. This formed the gap for the door. I was trying to make the inside of the vault look better with the lighting but and it was working for a little while but the further down the cube i went the lights made less of a difference. This started to get really tricky so I decided to cave and try out the donut tutorial. I didn't complete the tutorial however I did get quite a bit through it, the results can be seen on the right. I may continue this and show the results in the development section of the website

I went back to making the vault and after a few more tutorials I managed to create something I was generally ok with. It wasn't amazing but for my first time using my software I feel like it was alright.
Blender is tricky to learn, however I am really interested in learning more ways to animate in this software. Eventually I'd like to get around to actual character animation. I'd need more tutorials of course but I think this whole process was good at getting me down with the very simple basics of the software.
Click here to see all of the tutorials I used to learn blender.

Final Outcome
HCTV - Redesign
Echoes
HCTV has a brand new redesign. New Graphics. New Schedule. New Flare
Below you can see a full walkthrough of the new echoes redesign for HCTV

Above you can see the new logo for HCTV with a curved new sleeker look
We still wanted to keep our RGB design so you can see that in the middle.
Idents
A big part of this new rebrand is the new schedule for the channel. Each hour will have a new genre and theme of content for you to watch. Along side this schedule we have a set of idents to play.


Alongside these Idents you may remember that we also have a variety of live shows that we occasionally run
You'll be able to see when one of these play with help of a sleek new ident

Into The Vault
We also run a long list of old shows and films from our back cataloge. As a way of identifying these they have the branding of "Into The Vault"
These have and ident and a logo so you can easily differ them from our newest work


The Echoes rebrand marks a new path forward in not only the style and design of the channel but also it's profesionalism. Going forth HCTV will continue to see more designs, more order and more of an identity, one that within time, will begin to feel similar to a mainstay telivision network
Review
Feedback
After making any graphics and logos I would always show and ask my client for feedback and whether anything needs to be changed. Many times this made my work a lot better. This communication helped create better work for both me and the client
Alongside asking my client for feedback I also asked people around me for feedback as well. This was mostly for my graphics work. A good example of this was the feedback I got from the vault animation made on blender. I was given some useful advice on how to fix the clipping on the vault. Constantly having people to show my work to certainly improved my work flow and helped me to avoid mistakes or things that people don't really like in the future
Experience on the project
As a part of my proposal I said that this would be a good experience to see some of the bread and butter work I'd likely be doing in the future, It's ended up being a little bit more than just that. It gave me time to brush up on some old skills and practice some new ones going into the next stage of my education. Not only do I now have the experience with bread and butter graphics work. I can now safely say I'm able to competently make something good for these companies without constantly stressing whether it meets their demands and expectations. This project has really helped with my confidence in software and in myself. This is all down to the communication with my client. The depth of the graphics and logo's I made and the amount of new skills I've started to develop
Bibliography
bbc idents- https://www.bbc.com/historyofthebbc/research/bbc-idents/television-symbol - 09/04/2024
hcronnair youtube banner- https://www.youtube.com/@hcronair6485 -19/04/2024
BBC youtube banner- https://www.youtube.com/@BBC - 19/04/2024
ITV youtube banner- https://www.youtube.com/@itv - 19/04/2024
Channel4 Entertainment youtube banner- https://www.youtube.com/@Channel4Entertainment - 19/04/2024
Channel 4 youtube banner- https://www.youtube.com/@Channel4 - 19/04/2024
trash tase podcast infinity stream- https://www.twitch.tv/trashtastepodcast - 22/04/2024
pewdiepie infinity stream- https://www.twitch.tv/pewdiepie - 22/04/2024


